Since I am on a huge saving money kick - I thought I would share some more tips - read on to find out how YOU can start saving on your bill!
- make a list, and stick to it *I very rarely stray from my list, unless I find an un-advertised sale that is REALLY good (like paper towels for less than $5.00, or Peanut Butter for WAY cheaper)
- shop the outside aisles (produce, bakery and meat) the pre-packaged foods are in the center and can really make your total add up - plus they are a lot more appealing for impulse buys
- get to know the layout of your grocery store - this way you will know exactly where your items are, and avoid walking aimlessly through aisles with treats calling out your name
- price match: search the local flyers for the BEST sale (you need to know your prices for this) and then find a local store that price matches (RCSS, Walmart, FreshCo, Giant Tiger) and do all your shopping at one spot. You will need the current flyer to prove the price (or use the Reebee app on a mobile device)
and, my last tip for the day
- buy generic (store) brand whenever possible. It will save you tons of money, and often times there is very little taste difference *I don't ALWAYS buy store brand, but for the majority of items (never paper products, find they just are not as durable; and we are a kraft peanut butter family) but for salad dressings, pasta, sauces and rice etc, there isn't much of a difference.
I hope your enjoying my money saving tips - check back next Monday for more - and feel free to leave your tips in the comments!

Monday, April 30, 2012
Sunday, April 29, 2012
I have a secret....
I...........HATE.........laundry. There - I said it....what a load off my shoulders. No matter how hard I try and keep up with it, the laundry always gets ahead of me somehow.
I used to have a "laundry table" in the basement. Meaning that when I emptied the dryer, the clothes all went onto the table.
In the fall, hubby walled off the laundry area to make a playroom/laundry room so that I could contain the kids down there when I was doing laundry, in an effort to help make things easier and allow me to stay on top of it. Well, the kids LOVE it down there - but, they don't let me stay on top of the laundry. IF I happen to get it folded and put into a basket, Kyle comes along and dumps it all out in his attempt to help me.....and since I lost my laundry table when the renovation occurred, the clothes now sit on the floor (it's clean - promise) so I have a pile beside the washing machine that is dirty and needs to be washed, and a pile beside the dryer that is clean and needs to be folded and put away.
So - my secret is out. Now, I can be held accountable for staying on top of it. I am going to show you a picture of my laundry room - which I will take every Sunday and hopefully there will be some progress....so, here it is - please don't think too badly of me.........
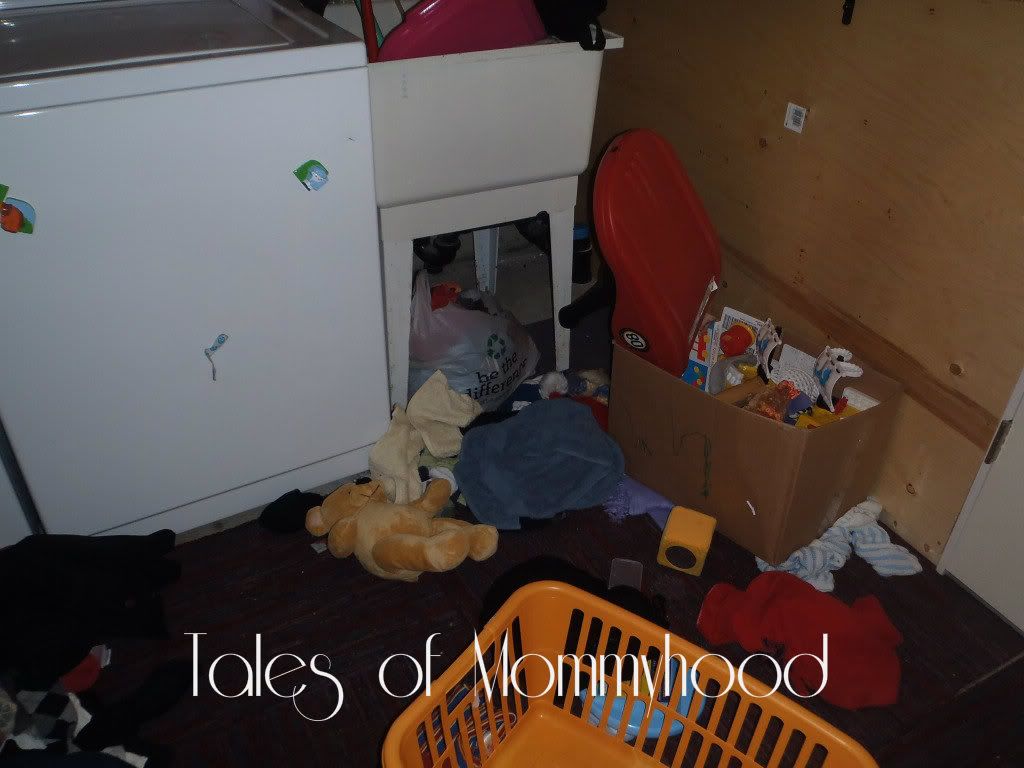 |
| the "need to be cleaned pile" - pretty caught up |
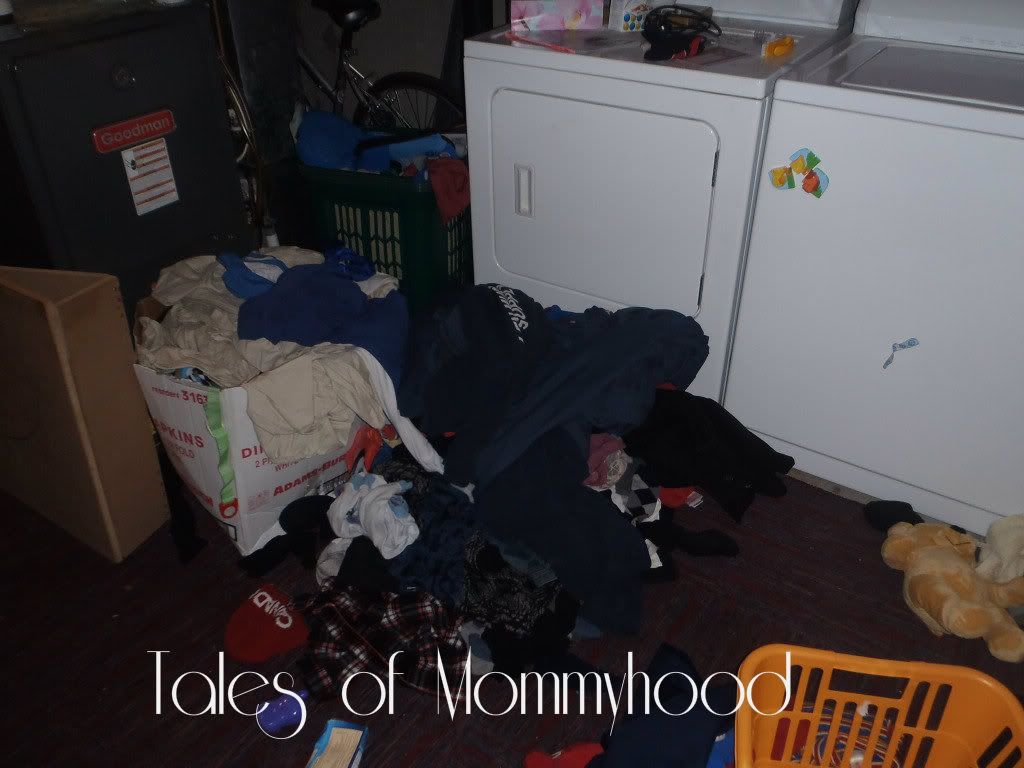 |
| the "clean" pile - - needs A LOT of work |
Thursday, April 26, 2012
McHappy Day - in support of RMHC

When Julien was born, at 36 weeks, his lungs didn't work properly - he was early, and they were not yet fully developed. The pediatrician on call at the hospital hoped that within 24 hours, his body would compensate and things would progress. However, that didn't happen. His condition actually worsened and he was transferred to CHEO. On the way there, his lung collapsed. They were able to insert a chest tube and that helped but he was intubated to increase his oxygen levels. Over the course of the next 10 days we spent many hours in hospital with him. Travelling back and forth from home or work - it was a very stressful time. For me, dealing with the hormones and emotions of being a new mom and also being seperated from my little one; for my husband - dealing with the emotions of being a new dad. Living in Ottawa, we are fortunate that we were able to go back and forth from our house to hospital (20 -25 minutes each way) - but there are many that are not. They live hours away, and money on hotels is often not possible. This is where Ronald McDonald House Charities come into play.
May 2nd is the 19th annual McHappy Day - please head over to your local McDonalds and buy a Happy Meal, Big Mac or hot McCaffe beverage to support this wonderful charity - McDonalds will donate $1.00 from each sale of these items.
McDonald’s® Canada community involvement efforts are yearlong. Since 2004, the company has raised more than $36 million for Ronald McDonald House Charities® (RMHC) Canada by donating 10 cents from the sale of every Happy Meal. McDonald’s Canada covers all of RMHC’s administrative and operating costs, making it possible for 100 per cent of every directly donated dollar to go to Ronald McDonald Houses and their programs.
RMHC Canada is the national organization that supports Ronald McDonald Houses and Ronald McDonald Family Rooms across the country, which provides families of sick children a home-away-from-home or a place of peace and calm within a hospital.
Ronald McDonald Houses help give sick children what they need most – their families.
I am participating in the McHappy Day Blogger Program by ShesConnected. A donation in my name was made to Ronald McDonald House Charities Canada in exchange for my participation in this campaign. All opinions are honest and always my own*
Guest Post From Evidently & Either Way
Good morning everyone! Today we are featuring a post from Lindsey - hope you enjoy it and check out her site for more great ideas! Thanks for visiting us here!
Hi, I'm Lindsey Petersen, author of the blog Evidently & Either Way, and I'm popping in to share some guest post space, and a quick little creative concept you that could keep you busy on a rainy day.
First, a little background. A few years ago, when bleach pens came out I started some experimentation with their magical powers on cotton-knit clothing that belonged to my kids. Over time, I managed to mess up quite a few projects thinking that the bleach pens would be as easy to use as my extensive collection of 80s puff paints. From my more recent and successful attempts, I've come to refine the process into an almost foolproof approach that's slightly less traditional than the others you may see on places like Pinterest these days. Included below I'll overview the two ways to accomplish this textile art that I'm calling "The Bleach Batik."
Bleach Pen Method
Recently I had a creative itch that just needed to be satisfied and it just so happened that I had a rare splash of time to myself, on top of that. I whipped out a shiny new Clorox Bleach Pen along with a kid's t-shirt I bought on clearance at Target and went to work on my quest to perfect my bleach batik process. Here are the steps I followed to get the end product.

Good luck and Happy Bleaching!
First, a little background. A few years ago, when bleach pens came out I started some experimentation with their magical powers on cotton-knit clothing that belonged to my kids. Over time, I managed to mess up quite a few projects thinking that the bleach pens would be as easy to use as my extensive collection of 80s puff paints. From my more recent and successful attempts, I've come to refine the process into an almost foolproof approach that's slightly less traditional than the others you may see on places like Pinterest these days. Included below I'll overview the two ways to accomplish this textile art that I'm calling "The Bleach Batik."
Bleach Pen Method
Recently I had a creative itch that just needed to be satisfied and it just so happened that I had a rare splash of time to myself, on top of that. I whipped out a shiny new Clorox Bleach Pen

Firstly, you can wash and dry the shirt first but I don't even bother with this method. The bleach is intense enough that I haven't run into any resistance with most any clothing I've tried to use. Also, some people will prefer to trace their design on the shirt with chalk first. While I see how that could be a good idea—it's also, not my style. the one thing you WILL for sure want to do is put something sturdy AND flat inside the shirt while bleaching (I used a large manilla envelope because it's what I had on hand) You may think your design will soak all the way through and make the back of the shirt equally as cool. It won't, so don't.
Another one of the most important things to do prior to applying the bleach pen directly to the fabric you're working on is to practice your first few strokes on a separate piece of material. Also - SHAKE the pen thoroughly for about 20 seconds before you even take off the cap. This simple step is something I've overlooked numerous times and skipping this can ruin the entire project before you even start. During your initial strokes on the scrap fabric you'll quickly see it takes some practice to get a steady hand with the bleach. Because the goop can come out in bubbles, I've come to find that having a straight pin on hand is imperative so you're able to pop the bubbles as soon as they appear. You'll also be able to get a feel for how quickly the bleach comes out and the amount of pressure you'll need to get a steady stream. I've found that with this approach, and while I'm working out the design on my fabric, I'm constantly giving the pen a shake to drive the gel down into the tip of the pen so as to keep it from sputtering.
At this point, you're going to draw your design. Don't be scared—just go for it. Follow the tracings you've laid out or just let your freehand be your guide.
As you're working you may begin to see the bleach converting the color of the shirt under the design you're creating. Typically, I try to have my design completed within about 15 minutes so the shirt can process (letting the bleach do it's job) without having one part sitting for an extended amount of time while the other parts I'm bleaching are still being worked on. Keep an eye on the shirt. Depending on the pigments in your fabric, the processing could take 15 minutes or could take 30-45 minutes (average processing time for me has been around 30 minutes). If you wait too long, the bleach bleeds too far and the overall design is compromised by a huge bleach halo AND the composition of the fabric is weakened by the bleach if left on too long.
Want to connect? Follow me on Twitter via @linzlinzlinz, stop by my blog at Evidently & Either Way, follow myPinterest Pin Boards, or swing in my very new and still developing Etsy Shop, The Bleach Batik.At this point, you're going to draw your design. Don't be scared—just go for it. Follow the tracings you've laid out or just let your freehand be your guide.
As you're working you may begin to see the bleach converting the color of the shirt under the design you're creating. Typically, I try to have my design completed within about 15 minutes so the shirt can process (letting the bleach do it's job) without having one part sitting for an extended amount of time while the other parts I'm bleaching are still being worked on. Keep an eye on the shirt. Depending on the pigments in your fabric, the processing could take 15 minutes or could take 30-45 minutes (average processing time for me has been around 30 minutes). If you wait too long, the bleach bleeds too far and the overall design is compromised by a huge bleach halo AND the composition of the fabric is weakened by the bleach if left on too long.
Once you feel the design is bleached out enough take your shirt to a sink (preferably one with a sprayer) and begin washing out the bleach gel. Do this quickly so there is no residual bleaching from the run off. Rinse thoroughly and then wash and dry traditionally.
Gel Dishwasher Detergent Method
After completing about 6 shirts with the bleach pen method, I started to research a cheaper way to pull off the same effect. I typically used up all of one Clorox bleach pen between two kid sized shirts and ultimately wanted more mileage out of the product. After a couple of days brainstorming, I discovered that Costco brand (Kirkland) gel dishwasher detergent has a bleaching effect. Coupled with small clear squeeze bottles with metal tips I suddenly had my own bleach pen...
Thus the birth of the new Bleach Batik process. If you're serious about playing around with this medium long-term, I suggest you invest in these little bottles, as linked above. The dishwasher gel is much more manageable, comes out with greater ease, and is more precise. Additionally, the dishwasher gel is much more cost effective. Lastly, unlike the white Clorox bleach pen gel, the dishwasher gel is clear. I find that it's much easier to track it's processing because you can see through it. The only drawback I've found to this method is the overall finished product looks a bit less organic than the straight bleach from a Clorox bleach pen. The lines are much more defined and the color of the bleached fabric is more white and less of a faded pigment of the shirt.


Whichever route you decide to take, just imagine all the projects you can create with these methods. Customized birthday shirts, holiday shirts, gifts, hats, shoes, aprons, totes, dishtowels, socks, tights, etc. There's no end.

Gel Dishwasher Detergent Method
After completing about 6 shirts with the bleach pen method, I started to research a cheaper way to pull off the same effect. I typically used up all of one Clorox bleach pen between two kid sized shirts and ultimately wanted more mileage out of the product. After a couple of days brainstorming, I discovered that Costco brand (Kirkland) gel dishwasher detergent has a bleaching effect. Coupled with small clear squeeze bottles with metal tips
Thus the birth of the new Bleach Batik process. If you're serious about playing around with this medium long-term, I suggest you invest in these little bottles, as linked above. The dishwasher gel is much more manageable, comes out with greater ease, and is more precise. Additionally, the dishwasher gel is much more cost effective. Lastly, unlike the white Clorox bleach pen gel, the dishwasher gel is clear. I find that it's much easier to track it's processing because you can see through it. The only drawback I've found to this method is the overall finished product looks a bit less organic than the straight bleach from a Clorox bleach pen. The lines are much more defined and the color of the bleached fabric is more white and less of a faded pigment of the shirt.


Whichever route you decide to take, just imagine all the projects you can create with these methods. Customized birthday shirts, holiday shirts, gifts, hats, shoes, aprons, totes, dishtowels, socks, tights, etc. There's no end.

Good luck and Happy Bleaching!
Wednesday, April 25, 2012
Speech Therapy
Julien was a very late talker. He said his first word (bye) around 11 months - but between then and 2, I think he may have had only 15-20 words. Our doctor was not concerned - his comprehension was amazing, and he was developing normally from what she could see - she said it would come in time.

At 2.5 - he had his first word explosion - I credit this to nursery school and being around other children. At 3, he had another one and the vocabulary on this child was amazing - however, no one knew what he was saying. I could understand about 50% of what he said - but that was it. People that didn't know him didn't understand hardly anything.
When he started school, the teacher mentioned that he should be seen by first words (the speech/language program run through our children's hospital). I knew about the program, but never sought their advice because I was under the impression he would get speech therapy in school should he need it - I was partly correct. CCAC comes into the schools starting in senior kindergarten - when they are 5 and first words no longer sees them.
Cue horrible, guilty mom feelings - I had delayed putting him on the waitlist, and now it would be even longer as he was only in junior kindergarten.
I took him to a first words assessment clinic to have him looked at, and they put him on the wait list - to which I found out was over 8months long.
Fortunately, we have private coverage - so we sought out a private Speech/Language Pathologist who we have been working with since October of last year. The progress he has made has been amazing. I am so thankful that we found his SLP - she knows just how to handle his personality. We have a ways to go in terms of his pronunciations etc, but he is getting there.
I am so proud of my little guy and his hard work - he loves going to see Mary Jane and playing games with her. One of the tools she uses in her therapy regime is an ipad 2 and apps geared at language and speech. I was amazed - I had no idea that they had apps for this. You see, my hubby and I don't have smart phones (we actually cannot even access the internet from our phones - yes, we are lacking in the technology department).
My goal now is to save up for a tablet / ipad so that we can help him out at home with these apps. They are things that he can do on his own if we set him up.
So, I am looking for recommendations on any kind of device that you have - and if you have used any apps for this type of thing, what would you recommend?
And hey - if your in the technology business and would like to offer us a tablet to use for our sons therapy - I would be happy to provide advertising for you on the blog, twitter and facebook - just contact me and we can get things started immediately.
Tuesday, April 24, 2012

Bible Girl Launch Giveaway
In 2011, The Golden Sky by EC
Stilson became one of the hundred best-selling books about loss on Amazon! Wayman Publishing is now
excited to announce the release of Bible
Girl—the prequel to The Golden Sky. This is the amazing true story of a hilarious
girl trying to find her way through the teen years. Bible Girl was just accepted
into the Barnes & Noble catalog and will be .99 for a limited time HERE.

Please join voiceBoks, Giveaway Promote, Good Steward Savers, Terri's Little Haven, and Linkie's Contest Linkies in
promoting this wonderful book launch. Here's a little blurb about the book:
The book practically cried for me to spare its life, and for a moment I thought I'd rather burn in Hell than lose something my brother had given me in love. The pastor nudged me, though, and my heart turned to ice.
I thought of all those hours my brother had read to me. I thought of all that time he'd invested.
I couldn't throw it into the fire; not the last book of the trilogy. That funny little dwarf stared at me from the cover. Then, I closed my eyes. I stepped so close to the flames they almost ate my skin. I tore the book in front of those kids. I put on quite a show throwing in a section at a time because I couldn't stand sending the whole thing in at once. When the last pages went up in flame, and the dwarf on the cover curled with death, I dropped to my knees and cried. The kids all hooted and screamed in ecstasy, thinking I'd been freed, when the ropes of religion had just twisted tighter.
Elisa isn't your regular nerd. She's not the kind of person who quotes Monty Python, or has a periodic table tattooed on her butt. No she's a different sort altogether. She carries a duct-taped Bible, wears bright-orange polyester pants, and dyes her hair with red Kool-Aid.
Although she tries slipping by apart from the crowds, it doesn't help that her best friend happens to be the "Boarder," one of the cutest and most popular boys in school.
It isn't until Elisa realizes she's surrounded by hypocrites that her foundation starts crumbling. She doesn't know who to turn to. That's when she meets a mysterious man. But maybe she shouldn't trust him after all.
Will he help her, or make things even worse than they were before?
This giveaway was made possible by the following sponsors:
Tales of Mommyhood |
Savior Cents | Sister's Saving Cents | My Side Of Life | Grandma Bonnie's
Closet | Peanut Butter
and Whine | TaylorCares | Club-Content | LaDy LaDuke | Military Wives Saving | Thrifty Mom's Reviews and More | Couponing From Florida to
Michigan | Christian
Coupon Clippers | this
mama loves her bargains | A
Maui Mompreneur | JadeLouise
Designs | Ann
Again... and again Reviews | Don't Make Me Nuts | Sprinkle Me Pink | CountryLife4Me | Cyns Coupons 4U | November Sunflower | BookZone | Like a
Bump On a Blog | Diva Fabulosa |
Happy Home and Family | J4C Home | Single Mom Inspirations
| Happy for Ever After | Viva Pinay | Raking in the Savings | Mommy LaDy Club | Diaper Days | Taken With Life | My Picnic Basket |
Shy's Mode | Icing and Write | Mom to Bed By 8 | A Day in Doha | mamawolfe | Miki's Hope | Making Time 4 You | Mommy Saves Money | Wrinkled Mommy | Layne's Thrifty Finds |
Just Married Mom of 3
| The Frugal Free Gal | GayNYCDad | Frazzled Five | Mommy Blog Designs
a
Rafflecopter giveaway
The book practically cried for me to spare its life, and for a moment I thought I'd rather burn in Hell than lose something my brother had given me in love. The pastor nudged me, though, and my heart turned to ice.
I thought of all those hours my brother had read to me. I thought of all that time he'd invested.
I couldn't throw it into the fire; not the last book of the trilogy. That funny little dwarf stared at me from the cover. Then, I closed my eyes. I stepped so close to the flames they almost ate my skin. I tore the book in front of those kids. I put on quite a show throwing in a section at a time because I couldn't stand sending the whole thing in at once. When the last pages went up in flame, and the dwarf on the cover curled with death, I dropped to my knees and cried. The kids all hooted and screamed in ecstasy, thinking I'd been freed, when the ropes of religion had just twisted tighter.
Elisa isn't your regular nerd. She's not the kind of person who quotes Monty Python, or has a periodic table tattooed on her butt. No she's a different sort altogether. She carries a duct-taped Bible, wears bright-orange polyester pants, and dyes her hair with red Kool-Aid.
Although she tries slipping by apart from the crowds, it doesn't help that her best friend happens to be the "Boarder," one of the cutest and most popular boys in school.
It isn't until Elisa realizes she's surrounded by hypocrites that her foundation starts crumbling. She doesn't know who to turn to. That's when she meets a mysterious man. But maybe she shouldn't trust him after all.
Will he help her, or make things even worse than they were before?
Monday, April 23, 2012
Ride a Bike. Extend a Life
For 25 years, the Becel Heart & Stroke Ride for Heart has been raising money to help fund research into heart disease and stroke. The ultimate goal of the Heart & Stroke foundation is to eradicate heart disease and stroke - and money raised will help them in their research to achieve their goal.

When I was 15, my father died. He had a heart attack - all of a sudden, he was gone. At the time, it was the biggest life event I had experienced (and even now, 17 years later is still pretty high on the list).
I want to help raise money for research into Heart Disease and Stroke - and you can help too! This year, the Becel Heart & Stroke Ride for Heart is taking place in Toronto on Sunday June 3. For more information on the Ride for Heart, to register or to donate - visit the website.
Unfortunately, I cannot make it for the ride - but I did just make a donation in my fathers memory - who do you know that has been affected by heart disease and stroke?
Friday, April 20, 2012
Tips for saving at the grocery store
 |
| Picture from one of my awesome price matching and coupon shops; total out of pocket was $74.16 the total VALUE was $140.24 - I saved almost HALF of my bill! |
I have talked a little
in the past about coupons and price matching – but I wanted to give everyone a
quick rundown of how I plan my shops.
When the flyers come
in, I sit down and make a very vague meal plan (what types of meals I want to
make that week – but I don’t pick nights for each of them) I try and make at
least ONE meal that will do double duty for leftovers (but often 2) - this means that I only have to cook 4 or 5 nights out of the week.
After I have done my
meal plan, I figure out what I have and make a list of what I need (I know the
areas in the grocery store, so I start with foods from the front and work my
way around the store that way – which means I don’t have to search my list for
items in a particular section). After I have done my list, I look through the
flyers to find the best deals and I mark the prices and where they are on sale.
Then, I go through my coupons to see if
I have any that match up with the sales, or for items I NEED that are not on
sale. (Don't get caught in the coupon trap of buying something just because you have a coupon - if you don't need it, don't buy it)
Sometimes while I am
doing this, my meal plan will change slightly based on great deals.
A little tip – when it
comes to paper towels – if the cost of the package is higher than the number of
rolls, you’re paying too much. They go on sale often, and there are lots of
coupons out there to be found for them, so stocking up when you find a good
deal is the best way to go. Toilet paper, I stock up when I find it on sale –
it’s something we always need – so if I have 4 packages sitting in the
basement- I am completely ok with that.
Now for tips about the
actual shopping trip – first, I suggest you find a store near you that price
matches. This means that you can do all your shopping in one place. Bring your
list with you (and you already have written down where the best price is) and
the flyers. I bring one of my shopping bins and anything that I am price
matching goes in the bin, everything else gets put in the cart. If I am using a
coupon, I put the coupon with the item.
When I go to the cash,
I have everything grouped together (PM from food basics items together with flyer,
etc etc) - make sure to tell the cashier you are PM before you start. Next, I
put all my coupon purchases (with the coupons on top) and last my items that I
am not using PM or coupons for.
I am going to estimate
that in the last 6 weeks, I have saved close to $150.00 by doing this
Thursday, April 19, 2012
Since the blog got a makeover....
I thought I would too!
I haven't had my haircut since October 2010 - Kyle was 6 weeks old
I went from this


I haven't had my haircut since October 2010 - Kyle was 6 weeks old
I went from this

To this


Summer Fruit Pizza - Guest post from One Sleepy Mom
I would like to introduce you all to Stephanie at The Moody Blonde / One Sleepy Mom- she is guest posting today - welcome Stephanie!


------------------------------------------------------------------------------------------------------------
Hello Everyone! My
name is Stephanie. I’m a stay at home
mom of 3 beautiful girls, ages 17, 15, and 17 months. (Yes, I’m crazy and busy!) I blog over at The Moody Blonde about a little of everything. I like to say that my
blog is schizophrenic. You never know
what you’re going to get!
I’d also like to give an extra special thanks to Ashley for
letting me guest post my recipe here today.
This is actually a Pampered Chef recipe. Back in the 90’s (really dating myself here),
I was a Pampered Chef consultant. This
recipe was one of the first I learned, and also one of the most delicious. And super simple. My motto for life is “the simpler the better“! With the warm weather coming quickly, who
couldn’t use a quick and easy summer dessert recipe?
Summer Fruit Pizza
Ingredients:
One package of cream cheese, softened (Any brand will do - I
usually go generic.)
One package of refrigerated cookie dough - If you are a
great baker, go ahead and make your own cookie dough. I’m just not that kind of girl!
1/3 cup of sugar
4 cups of fresh fruit - I used strawberries, kiwi, and
peaches, but you can use anything you’d like.
Start by rolling the cookie dough into a huge ball, and then
spread it out onto a pizza stone, leaving about an inch around each edge for
the cookie to expand. (Because this is a
Pampered Chef recipe, they recommend the stone, and I happen to have one. A regular cookie sheet would work just fine.)
Bake at 350 for 18-20 minutes. While the cookie is baking, mix together the
cream cheese and the sugar. Cut up your
fruit.

After letting the cookie cool, spread the cream cheese
mixture onto the cookie, and then decorate with the fruit.

Yes, it’s that simple.
And if you serve it to guests, they will think you are AMAZING!

The sunshine vitamin - Ddrops review

The sunshine vitamin in just one drop!® for adults
We may not do it by diet alone! Canada’s Food Guide has recognized that vitamin D is the only nutrient which adults over 50 cannot rely on diet alone to receive their recommended daily dose. See Sources of Vitamin D
We shouldn’t do it by sun alone! The Canadian Dermatology Association says “In order to lessen the health risks associated with skin cancer yet still reap the known and possible benefits of vitamin D, the CDA recommends people concerned about vitamin D levels take 1,000 units of vitamin D supplements a day. These are safe to use and equally effective as the sun in maintaining healthy levels of this vitamin in the body while avoiding the risk of getting skin cancer.”
Ddrops® are the sunshine vitamin in just one drop!® Ddrops® offers people an alternative to taking conventional pills or capsules. Two formats allow adults to get just the right amount of vitamin DDdrops® 1000 IU and Ddrops® Booster 600IU.
Ddrops sent me 1 vial (180 doses) of the Ddrops booster to review:
The best thing (in my opinion) about Ddrops (any of them, not just the booster) is that all you have to take is ONE drop. That's right folks - it is not a pill, it's a liquid and 1 drop gives you your dose. You can add it to a drink, food, a baby's bottle, or just lick it off a spoon or a clean hand. That's it - simple as that. Also, it is completely odorless AND tasteless!
I have worked with Ddrops in the past, and you can check out my review of Baby Ddrops.
Don't forget to connect with them on FaceBook andTwitter.

Wednesday, April 18, 2012
Guest poster at One Sleepy Mom
Wednesday I will be sharing a guest post over at One Sleepy Mom! Thanks to Stephanie for letting me stop by and share a story with her readers - I hope you will head on over to One Sleepy Mom and check it out - a post about a gift from Julien!
Viking Sandal Giveaway

Viking Sandals has paired up with Infulential Media to do a giveaway! The prize is 1 pair of Viking Sandals (Value of $64.99). The giveaway is open to Canadian residents (excluding Quebec) and will close on April 23rd at 12:01 am. Use the rafflecopter form below to enter!
Thank you to Viking Sandals (www.vikingsandals.com) and Influential Media (www.influential-media.com) for hosting this giveaway.

Tuesday, April 17, 2012
Busy Busy Busy
Things are very busy behind the scenes at Tales of Mommyhood right now! I have been networking and putting together some great prizes for a few blog hops and events over the next few months! I am VERY excited about working with these new sponsors.
They will be kept under wraps for now - but just know that there are some great things coming YOUR way - and keep checking back.
They will be kept under wraps for now - but just know that there are some great things coming YOUR way - and keep checking back.
Monday, April 16, 2012
My UBP story (#ubp12)

Last year, when I first REALLY got into blogging, I somehow came across the UBP11. I decided to join, and it opened up a whole new world for me (my UBP11 post).
I gained a few followers on the blog, twitter and facebook - and learned about twitter parties (so much fine BTW - if you have the chance, check it out!)
A few weeks ago, I got to thinking that it must be time for UBP12 - so I did some searching and found out the dates - I got to work on my party post right away... I was so excited, it brought back such fun memories (which as a non blogger may be hard to understand - the relationships we build - yes, even without ever meeting - are quite amazing.)
Here I am - in the midst of UBP12 and enjoying all the blog hopping , twitter visits and facebook pages! Please check out 5minutesformom to find out more about UBP!
Guest posters welcome
I have decided that I would like to have Thursday posts be from guests - so any bloggers our there (or even if you don't have a blog of your own but would like to write something) let me know - I would love to have you stop in here for a visit.
I am open to any subject - as long as it is family friendly and legal!
I am open to any subject - as long as it is family friendly and legal!
It's Raining Cash - giveaway

This giveaway is open worldwide.
It will end at 11:59pm EST on April 29th, 2012.
Sunday, April 15, 2012
Latest cake
You all know my love of cake decorating (and if you don't, have a look around and you can see some of my creations!)
Julien's school is having a raffle this week - and they asked for donations of baked goods. I wasn't sure what to make, so I asked on a FB group and one of the girls mentioned a cake she had seen - the very hungry caterpillar. As soon as I googled it - I knew I had to attempt it.
So - here it is!


Julien's school is having a raffle this week - and they asked for donations of baked goods. I wasn't sure what to make, so I asked on a FB group and one of the girls mentioned a cake she had seen - the very hungry caterpillar. As soon as I googled it - I knew I had to attempt it.
So - here it is!


Saturday, April 14, 2012
Shoppers Drug Mart 20X Optimum Points Event
Today only you can get 20x optimum points when you spend $50 or more (on almost anything) in the store! I went this morning, and between price matching (my local SD$1.00 off coupon for pinesol which was on sale as well! Huggies diapers on sale for $17.99 with a $2.00 off coupon.
My total coupons were valued at $8.99; PM savings of $10.00 and almost everything I bought was on sale! It was great way to help save up my points.
I accumulate them (mostly on 20x point days) and then use them for a double redemption day around Christmas - this is how I fill the stockings in our house!
If you don't have an optimum card you should look into getting one!
Friday, April 13, 2012
I think he is done {breastfeeding}
I love the nursing relationship I have had with both my boys. Julien nursed until 14.5 mths - I had somewhat weaned him (he was a complete booby baby and NEEDED the boob even if I wasn't with him, so with my return to work - even just part time - I knew he would need to be day weaned.) once that happened, he weaned himself completely over the next few weeks.
With Kyle - I was hoping to make it to 1 yr....and then we hit the 1 yr mark with no signs of stopping. He had put himself on a pretty much set nursing routine around 8mths - he really only nursed at wake up in the morning, and then before nap and bedtime....if he woke at night he would nurse then too. But that was it - he was never really a comfort nurser and other than sleep times, the only time he nursed during the day was when he was sick. I knew I had no intentions of leading the weaning process, and over the last 8 mths there have been a few days with little nursing - but this time, it has been 5 days. He hasn't nursed ONE time in 5 days. I am a little sad, but happy that it is on his terms. I still offer the breast at bedtime - he just hasn't taken it. I am hoping that it is just a nursing strike, but fear that I will dry up as he nursed so little to begin with. So I do believe that at 20 mths, he is done. I will continue to offer for another week or so....but that's for my own emotional needs.
I will now leave you with a few pictures from a photo session I had done - I have no pictures of nursing my oldest, and that saddens me. So I made sure to have a nursing session done with Kyle.


ETA: He actually continued to nurse until 22 months!
when the inevitable happens
Kids love pets; I think it is normal that they constantly ask for a pet. I grew up with dogs, and while I am still a huge dog lover today, I have no interest in adding any kind of pet to our home.
Today, however - Julien asked the inevitable question - "mommy, how about we get a pet fish?". Now, to most people, your probably thinking that it is a great idea to get a pet fish. Pretty simple to take care of, no walking involved and relatively little impact on your life.
However, you don't know my history with fish. When I was 11, I begged my parents for a goldfish. They finally gave in, and off to the pet store we went. I found a cute little fishbowl, and decided on the goldfish I wanted. The pet store clerk bagged it and home we went. I was so excited to have my fish. The next day, I decided that Goldie was lonely and needed a friend. Back to the pet store I went, and another goldfish was brought home in a bag. A couple days later, I noticed the bowl needed to be cleaned. My parents were on their way out, and told me they would help me when they got home. That wasn't acceptable to me - these were my fish, and I was going to take care of them all on my own.
I grabbed a large plastic container, filled it with water and transferred the fish...what happened next scarred me for life - honestly, it did. The fish swam down - - and then they floated right up. I screamed for my brother to come and help me rescue the fish - but by the time he got there it was too late. I was heartbroken - who knew that fish don't need to be kept warm in hot water? Really - please keep in mind that I was 11, and I had the best of intentions. I didn't want them to be cold while I was cleaning their home.
I was in tears, and it was not made any better by my loving brother that kept reminding me I boiled my fish... (really, 20 years later and it is still something he teases me about) My parents arrived home to find me heartbroken and in tears, and to make it up to me my dad took me to the pet store, bought me a very nice aquarium and let me pick some tropical fish - with the promise that I not ever clean the tank without his help.
So, now that you know the back story, you will maybe, somewhat understand why I was praying that my children would never, ever utter those words. Julien didn't really understand why or how I killed my fish, but when he saw the bunny rabbit he wasn't even paying attention to me - as I was trying to hide the tears welling up in my eyes.
It took many, many years for me to even be able to speak of my first fish owning experience.....and now I can kind of see the humour in it. But my poor, poor niece - I found out last summer that she also boiled her fish......
Do you want to try Gold Label Virgin Coconut Oil?
Tropical Traditions recently sent me a
jar of Gold Label Virgin Coconut Oil to review. Until this point, I had never even heard of
coconut oil. I was surprised to learn that there are MANY different uses for
coconut oil – you can find out those uses by clicking here. The first thing I noticed when I opened the jar was how wonderful it smells - I felt like I had been transported to a tropical island!

What is Virgin Coconut
Oil?
Virgin Coconut Oil
There is no industry standard definition for "Virgin Coconut Oil" as there is in the olive oil industry for "Virgin" and "Extra Virgin" olive oil. Today, there are many coconut oils on the market that are labeled as "Virgin Coconut Oil." Tropical Traditions was the first company to publish standards for the use of "Virgin Coconut Oil" in terms of edible oils, and here is what we published over ten years ago:
Virgin Coconut Oil can only be achieved by using fresh coconut meat or what is called non-copra. Chemicals and high heating are not used in further refining, since the natural, pure coconut oil is very stable with a shelf life of several years. There are currently two main processes of manufacturing Virgin Coconut Oil:
1. Quick drying of fresh coconut meat which is then used to press out the oil. Using this method, the coconut meat is quick dried, and the oil is then pressed out via mechanical means. This is the most common type of "Virgin" or "Extra Virgin" (see below) coconut oil sold in the market today that you will find in stores. It is mass-produced. (see our Green Label Virgin Coconut Oil)
2. Wet-milling. With this method the oil is extracted from fresh coconut meat without drying first. "Coconut milk" is expressed first by pressing. The oil is then further separated from the water. Methods which can be used to separate the oil from the water include boiling, fermentation, refrigeration, enzymes and mechanical centrifuge. (see our Gold Label Virgin Coconut Oil)
As I said above, I was amazed to learn that Coconut Oil can be used as a supplement, natural hand soaps, cooking (I am a huge chocolate lover – and this fudge recipe looks WONDERFUL) and more.
Watch this video to see how to use the oil
**Disclaimer: Tropical Traditions provided me with a free sample of this product to review, and I was under no obligation to review it if I so chose. Nor was I under any obligation to write a positive review or sponsor a product giveaway in return for the free product.**
Win It: if you want to win your own 32FL oz jar of coconut oil, use the rafflecopter form below
Canadians - please note that Tropical Traditions and Tales of Mommyhood are not responsible should you be charged customs or duty charges upon delivery
Thursday, April 12, 2012
Win 1 of 5 #RogersSmartHome Monitoring Systems (Ontario, Canada only)
Did you forget to turn off your lights when you left the house? With Rogers Smart Home monitoring system you can do it from your Smart Phone* or any internet enabled computer. Same with your thermostat – you could raise or lower the temperature remotely to have the house set perfectly for when you arrive home; this feature would be awesome for my hubby – he works in construction and when the humidity is at it’s peak in the summer, he likes to come home to a cool house. If I am not at home, he could set the temperature to his liking before he left work and come home to a nicely cooled off house.
Ontario residents can enter to Win 1 of 5 Rogers Smart Home monitoring systems – the contest is open until May 16, 2012 – so hurry over HERE and enter to win. Once you have entered, you can share it with friends, family and co-workers, and if they use your link to enter, YOU will get an extra entry into the contest!
Ontario residents can enter to Win 1 of 5 Rogers Smart Home monitoring systems – the contest is open until May 16, 2012 – so hurry over HERE and enter to win. Once you have entered, you can share it with friends, family and co-workers, and if they use your link to enter, YOU will get an extra entry into the contest!
If you are over the age of majority, are an Ontario, Canada resident that owns or rents their own home, then this contest is for you!

The Rogers Smart Home system features:
When you go to rogerssmarthome.com contest there are 4 quick 'n easy steps to enter:
- real time 24/7 monitoring,
- instant customizable alerts,
- view and control your home remotely,
- automate sensors, thermostat, lights and appliances,
- save energy and save money,
- and more.**
When you go to rogerssmarthome.com contest there are 4 quick 'n easy steps to enter:
Page 1: Enter the contest by providing your contact information
Page 2: Answer a "what's important to you" question
Page 3: Check the boxes that apply to you (4 survey questions)
Page 4: Share! Increase your chances of winning by sharing via social channels/email (there are simple share buttons for Facebook, Twitter & Email) but you can share it other places as long as you use your PURL.
Prize valued at $1,518.83 each and includes:
**The system is both connected via wires and also cellular. The components are wireless so if you move, you take them with you!
Disclaimer: Tales of Mommyhood or those affiliated with this blog are not responsible for any changes Rogers may make, choosing the winner or shipping this prize. Tales of Mommyhood has been hired by a marketing company on behalf of Rogers Smart Home to share this contest with you.
- 1 Touchpad
- 3 Door/Window Sensors
- 1 Motion Detector
- 1 Key fob
- 1 Camera
- 1 Thermostat
- 1 Lamp Control
- Service for one year
**The system is both connected via wires and also cellular. The components are wireless so if you move, you take them with you!
Disclaimer: Tales of Mommyhood or those affiliated with this blog are not responsible for any changes Rogers may make, choosing the winner or shipping this prize. Tales of Mommyhood has been hired by a marketing company on behalf of Rogers Smart Home to share this contest with you.
The Great Canadian Blog Bash 2012

I will be participating in The Great Canadian Blog Bash 2012 this year! I am in search of a sponsor, so if you are a Canadian company that wants some exposure - let me know if your will to provide a prize to a Canadian winner!
If you want more information on what TGCBB is, then click the button at the top of this post and it will take you over to Mom Vs. The Boys where you can get the information!
Check back here on June 25th to see what I have come up with for a giveaway!
My first guest post
I have written my first ever guest post! Head on over to Multi-Testing Mommy to have a look about my thoughts on having 2 kids of the same gender!
Wednesday, April 11, 2012
Sponsored Video: Zellers Memory Showcase: Starstruck
Right now Zellers has a contest on - click HERE and you can enter your Zellers Memory story for a chance to win a $250.00 Zellers gift card!
Watch the Zellers Memory Showcase below and then head over to enter your memory!
**I will be compensated should you click on the video. I was not under any obligation to post the video and as always opinions stated belong to Tales of Mommyhood and your experiences may vary**
Tuesday, April 10, 2012
#UBP12

I am taking party in #UBP 12 this year (The Ultimate Blog Party). I stumbled across it last year and participated - you can see my post HERE. Enter using the rafflecopter form below to WIN $25.00 via paypal!
My name is Ashley, and I am a 30 something woman. I have 2 boys - Julien is 4.5, full of spirit and definitely knows his own mind. He is in half day JR kindergarten, and he absolutely loves school.
Kyle is 20 mths, a little devil - that is for sure. He knows what he wants and when he isn't happy he is sure to let you know. He seems so much older than his age, and I am not 100% sure if that is because of his personality or because he is a 2nd child. I hope you will settle in here for a little while and peak around getting to know me!
I have never been one that is hugely into parties; I am a home-body and would much rather have 1 or 2 friends over than attend a HUGE party. We do host a few good sized get togethers every year (a boxing day party and a Canada Day party!)
I am looking forward to partying with all of you during UBP12 though! I will grab a glass of wine when the kids go to bed and plan on visiting lots of blogs throughout the week!
Interested in a giveaway? click here and here for your chance to win - and scroll down further for my UBP CASH prize!
I will leave you with a picture from the best party of my life - February 4, 2006 - my wedding day!

being a stay at home mom
Growing up - I wanted to be a mom. It's all I have ever REALLY wanted to be. When Julien was born, I cherished the time I had at home with him. When he was 14 mths old, I went back to work a couple of days a month. I ended up working a few days a week, and continued that pattern until late in my pregnancy with Kyle.
Being home definitely has it's ups and downs. I LOVE that I get to spend the time with my kids; being able to witness the majority of their firsts is something that I treasure.
Then, there are the days where they drive me to rip out my hair. There are days where I would love to run away and go back to work full time (well, not really but in these instances it seems like a vacation!)
My house is never clean; my kids are often dirty; but they have fun and that's what matters. Helping to create the happy memories that I hope they will have - is what makes me stay home. I can clean my house when the kids are old enough to not mess it up as I go!
Monday, April 9, 2012
New look for Tales of Mommyhood
I have been wanting to get a blog makeover for quite awhile. I searched and searched, tried a few things (that I didn't like) and just couldn't come up with anything. I put it out on twitter that I was on the hunt for a new look, and wound up connecting with Lisa Marie. We are both in a blogging group, but hadn't actually connected before.
Lisa Marie and I chatted over email for a few days and I gave her a few ideas floating around in my head (which weren't many - I really am not a very creative person).
Lisa Marie was able to pick through the muddy ideas I had and pull out pretty much exactly what I was envisioning - and here we have it! My new look!
I hope you like it - and keep stopping by to see what's happening around here.
You can learn more about Lisa Marie over at her website. She doesn't have a design page up and running yet, but you can find her email and contact her!
Lisa Marie - thank you for all your hard work this weekend - I am super happy with the new look here at Tales of Mommyhood!
and it's done
Easter is over for another year - but somehow my house is still overrun with Chocolate. Every year I say no candy - but then end up going overboard.
Next year, the only chocolate they will get is what the Easter Bunny leaves for an egg hunt. Other than that, they will get a few outdoor toys - and I think that will be it. (someone please remind me of this while I am doing my easter shopping!)
The kids have had chocolate for breakfast again today - I think I will be hiding their Easter stash this afternoon.
Sunday, April 8, 2012
Happy Easter
Easter is upon us - and with that means the real signs of spring! I have already noticed that there are buds on our honey locust tree in the front yard (which I have a love/hate relationship with. I love looking at it; it's large, pretty and provides some shade. I hate the fact that it drips sap on our vehicles and it's tiny little leaves end up everywhere.....)
Tulips are sprouting up in our neighbours yard; the birds are chirping and the sun is shining!
I hope that all of you have a wonderful Easter and enjoy whatever traditions it is that you have!
For us, the Easter Bunny will leave a hunt for the kids on Sunday morning, and we will be heading over to my In-Laws place for dinner Sunday night. Monday, I will take the kids out with another family and we will head to a farm. This will be the fourth year that we will get the families together - the boys always have tons of fun!
Happy Easter!
Saturday, April 7, 2012
snack time
Just a tasty little treat I thought I would share. I used to order something similar off the menu at the cheshire cat pub (local pub we frequent) but it isn't on any longer....so I now have to settle for making my version at home
baguette slices
soft ripened goat cheese, warmed
1 pepper, sliced and roasted (red, green or yellow)
balsamic vinegar (for drizzling)
 smother the baguette slices in the warmed goat cheese and top with roasted pepper slices ; drizzle with balsamic vinegar and enjoy!
**you could sub cream cheese for the goat cheese**
baguette slices
soft ripened goat cheese, warmed
1 pepper, sliced and roasted (red, green or yellow)
balsamic vinegar (for drizzling)

**you could sub cream cheese for the goat cheese**
Friday, April 6, 2012
Decorating Eggs with my little guy!
This is the first year that I have actually decorated eggs with Julien. It isn't something that occurred to me to do before, but after posting about breakfast for learnings "eggs factor" I decided to do it.
I boiled some eggs this morning and then let them cook/cool down.
I poured some vinegar (I didn't have much) into a few containers and then added some colour. When Kyle went down for his nap, Julien and I got to work
I boiled some eggs this morning and then let them cook/cool down.
I poured some vinegar (I didn't have much) into a few containers and then added some colour. When Kyle went down for his nap, Julien and I got to work
 |
| getting started |
 |
| getting them dyed |
 |
| finished product! |
Thursday, April 5, 2012
Super Blake and the Cavity Monster - review and giveaway

I was sent a copy of the book "Super Blake and the Cavity Monster" to review with my son. At the moment, he is getting a little bored with the current selection we have so this was the perfect time to receive a new book!
Tracy Bickhaus has done a terrific job creating a story that involves a super hero (complete with super hero outfit) for little boys and girls to relate to. In this story, you learn about Ginger Vitis, Sir Plaque and the Cavity Monster. Super Blake and the Cavity Monster is the first in the series of Super Blake books.
My oldest is getting pretty picky with the books he reads now - and he is really into rhyming ones - and this fits the bill perfectly. The illustrations (by Korey Scott) are also bright and colourful, and Julien enjoyed it so much we had to read it again.
I have partnered up with Tracy to offer 1 of my readers the chance to win their very own copy of Super Blake and the Cavity Monster - as well as a chance to win a Kindle Fire. Check out the Rafflecopter forms below for your chances!
Head on over to www.superblakebooks.com to learn more. You can also connect with Super Blake on Facebook, twitter and you tube.
ETA: I am changing the end date to April 20, 2012
Buy It: Purchase your own copy of Super Blake and the Cavity Monster on facebook to receive 10% off
Win It: Use the Rafflecopter form below to enter for your chance to win a copy of Super Blake and the Cavity Monster
Wednesday, April 4, 2012


It's Raining Cash - join the event!

We'll be participating in the upcoming "It's Raining Cash" Giveaway Event!
This event is hosted by Giveaway Promote and will be held from April 16th-29th.
You can sign-up until April 7th.
Their most recent cash giveaway event, the $700 Winter Blast of Cash Giveaway, had an incredible turnout with over 120 blogs participating and 275,000+ entries. Participants in that event gained hundreds and even thousands of new followers!
We’d love for you to join us in the next big event. The prize is already at $400. Links are only $4!
Sign up for the “It’s Raining Cash Giveaway” event
Please mention that I referred you!
Astro Original Greek Yogourt - Winner
The winner of the 3 Astro Original Greek Yogourt coupons is : Melinda! Congratulations Melinda - you will be receiving your coupons soon!
I have been experimenting with some of the recipes provided by Astro, and so far my 2 favorities are the Egg Plant Dip and Cranberry/Blueberry Smoothie
Grilled Eggplant and Yogourt Dip
1 eggplant (about 1 lb/450 g)
¾ cup Astro® Original Plain
Greek yogourt
1 clove garlic, minced
1½ tsp lemon juice
1 tsp olive oil
½ tsp salt
1 tbsp chopped fresh parsley
Preparation
1. Pierce eggplant all over with a fork. Place on a greased grill over medium heat; close
lid and grill, turning once, until charred and wrinkled and flesh is softened, about 20
minutes. Let stand until cool enough to handle.
2. Slice eggplant open and scoop flesh into a bowl, discarding skin. Mash and let drain
in fine-mesh sieve for 20 minutes.
3. In a bowl, combine yogourt, eggplant, garlic, lemon juice, oil and salt.
4. Refrigerate for 1 hour before serving.
Garnish with parsley. Makes 1½ cups.
I enjoyed this dip with a sliced up baguette and pita wedges - delicious!
You know what though? The Astro Original Greek Yogourt is great on its own also. It is so thick and creamy, and it doesn't have a too strong tartness to it like some plain yogourts do. Go on out and try it for yourself!
I would like to thank Parmalat Canada for the opportunity to work with them on this giveaway, and for supplying the winner with 3 FPC's!
Subscribe to:
Posts (Atom)